 Installation of the Zega Mame Boy+ DIY kits require soldering to complete the setup. Only attempt if you are confident in your soldering ability. By attempting to complete the setup of the Zega Mame Boy+ you are confirming that you accept responsibility for any issues and / or damages that may arise due to incorrect installation.

Refunds will only be given if no attempt has been made to perform the setup and the kit can be returned in its original state. I can help fix any issues as long as the kit can be returned to me at the buyers expense. Charges will occur for any remedial work carried out and any costs will be confirmed before the work is started. Please contact me with any concerns that you have, or if you would like me to carry out any soldering for you

DO NOT EXCEED 5V, 2.5A while charging
DO NOT USE FASTCHARGING
DO NOT USE A CHARGER DESIGNED FOR ANOTHER SPECIFIC DEVICE (SUCH AS A SWITCH)
DO NOT USE WALL SOCKETS WITH BUILT-IN USB PORTS
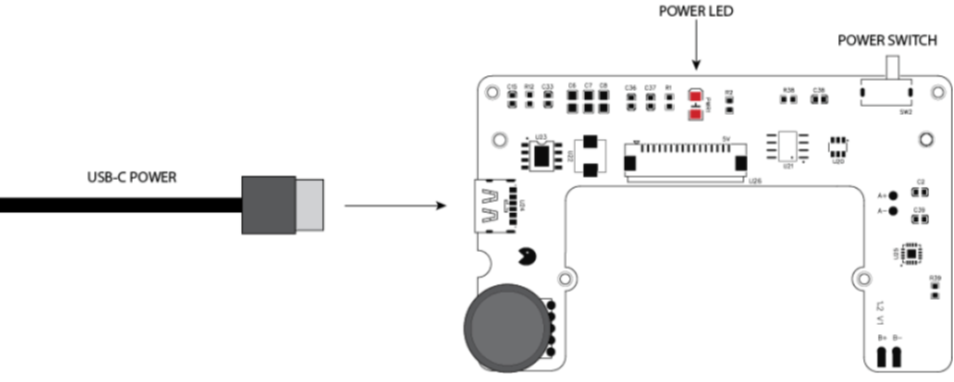
Step 1 - Test the Power Supply
Connect the Charging / Audio Board to a USB-C power source and toggle the power switch. Ensure the power LED illuminates. You will need to cycle the switch twice to change from power-on to power-off, this is normal.
Step 2 - Connecting the Mainboard
- Disconnect the mains power supply
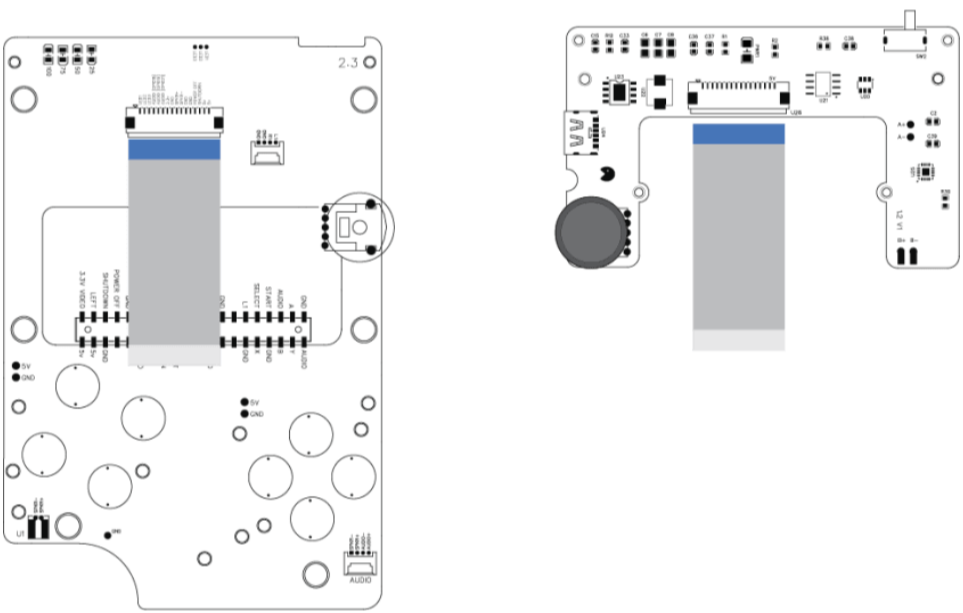
- Connect the Charging / Audio Board to the Mainboard using the supplied flat ribbon cable.
- Connect the power supply. The battery level LEDs on the Mainboard should now illuminate (3 Solid LEDs and 1 Flashing LED) meaning the power supply to both the Charging / Audio Board & Mainboard is good.
- Disconnect the Power Supply
Step 3 - Audio
- Connect the speaker to the Mainboard using the supplied 2 pin connector
- Connect the Audio Jack PCB to the Mainboard using the supplied 4 pin connector
Step 4 - Image Download
- Download the image for your model of Raspberry Pi Zero from the Downloads area of the Zega Mame Boy page
- Unzip the file to your computer and burn to an SD card (minimum 8GB)
Step 5 - Plug in the Raspberry Pi Zero / Zero 2
- Ensure all power is disconnected.
- Plug the Raspberry Pi into the 40 pin header located on the rear of the Zega Mame Boy mainboard.
- Connect the USB-C power supply and power on using the power switch.
- Power on. On applying power you should first see a white display on the LCD. Ensure you have increased the contrast to full.
- First boot can take a little longer. Please allow up to a minute to fully boot.
Step 6 - Mainboard Check
- Once Retropie has loaded, check every input pad for correct operation. Use a Gameboy DPAD rubber to press each contact pad individually.
- Use the power switch to shutdown the device. If all is connected correctly, Retropie will shutdown and all power will be disconnected.
- Once power is disconnected, the LCD will switch off. It is now safe to remove the USB-C power supply
Step 7 - Battery
- Ensure all power is disconnected
- Pre-tin the two battery connector pads on the Charger / Audio Board
- Solder the supplied battery extension cable to the battery pads located on the Charging / Audio board.
- Ensure the red wire is soldered to the positive pad (B+) on the Charging / Audio board.
- Connect a battery to the extension cable. Ensure your battery connector polarity matches the battery extension wiring. Not all battery connectors are the same.
- Toggle the power switch until the power LED on the Charging / Audio board illuminates The battery level indicator should now display the available battery level Toggle the power switch until the power LED goes off. When switching off, the battery level LEDS will remain illuminated for approximately 30 seconds
- Wait for the battery level LEDS to turn off.
- Connect a USB-C power supply. The Battery level indicator will now show the battery level, with a flashing LED showing the battery is now charging.
- Leave to charge for a minimum of 30 minutes
- Disconnect the USB-C power supply